|
|
In portrait photography, sometimes people need some corrections in their face or bodies. It is possible by selecting suitable light and angle of photographing. Today, digital world has made it easier. You can do any changes AFTER taking photos by using software as Adobe Photoshop CS2… There are lots of options to do retouch or even surgery on face or body. Among them “Liquify” is a miracle for portrait photography. We could change the size of a part of a face or body as elbow, chin… fading distortion in nose… empowering or making thin the arms… It is easy to use “Liquify Filter”, but it needs patient and precision. To use it, make the following steps:
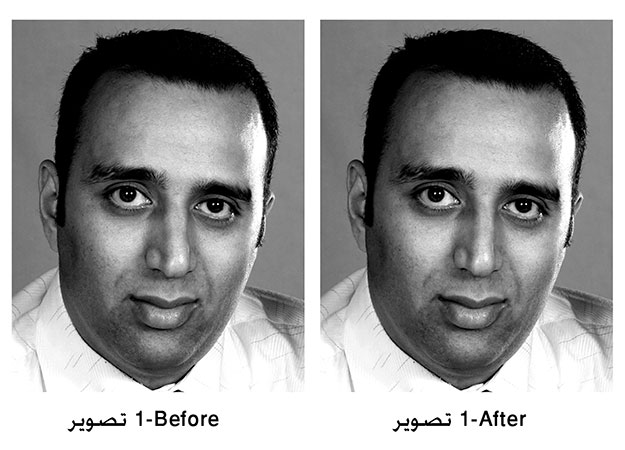
- Open your image (No. 1-left photo) and duplicate the main layer.
- Select the “Copy Layer”, and “Liquify” from the filter menu. A new page, with two menus, opens. You could find retouch tools and options at left.
- Suppose you want to correct the distortion of the nose in the following portrait.
- Use the “Zoom Tool” from the left menu (or type “Z”) to enlarge the photo for easy selection of the nose.
- Use the “Forward Wrap Tool” (W)at the top of the left menu (or “W” on keyboard).
- Choose the “Brush Size” due to the size of the nose. I selected 58.
- Choose the suitable “Brush Density” on 100; the lower number will result the softer edges, and vice versa. Your cursor is circle with a “+” sign at the center.
- Put the “+” sign on the point you want to correct; keep the left click and move the mouse over the nose and wrap.
- Then change the “Brush Size” bigger, at the same size of the nose or bigger, to correct the whole distortion of the nose. I selected 199/86/100.
- Then shrink the brush size to 39 to rise the nose up; be careful to result the natural correction!
- Click on “OK” at the end.
You can cancel the whole changes by using the “Restore All” from the right menu, or canceling a part of it by using “Reconstruct” key, as well as Ctrl+Z over and over.
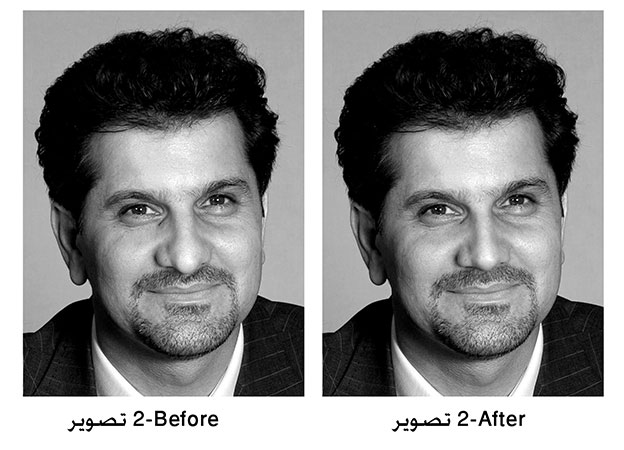
To correct the next image (No. 2), use the “Pucker Tool” (S) from the left menu (or type S).
- Select 129/100/100 and move the nose up.
- To protect some parts still, type “F”, or use the “Freeze Mask Tool” from the left menu.
- Choose 30 for brush size and 70 for brush density. Move the mouse on the moustache and chicks (You’ve colored them!) to hold them still.
- In the right menu, uncheck the “Show Mask”, if you want to see the correction better.
By using “Liquify” you can change the form of any subject to the desired shape!